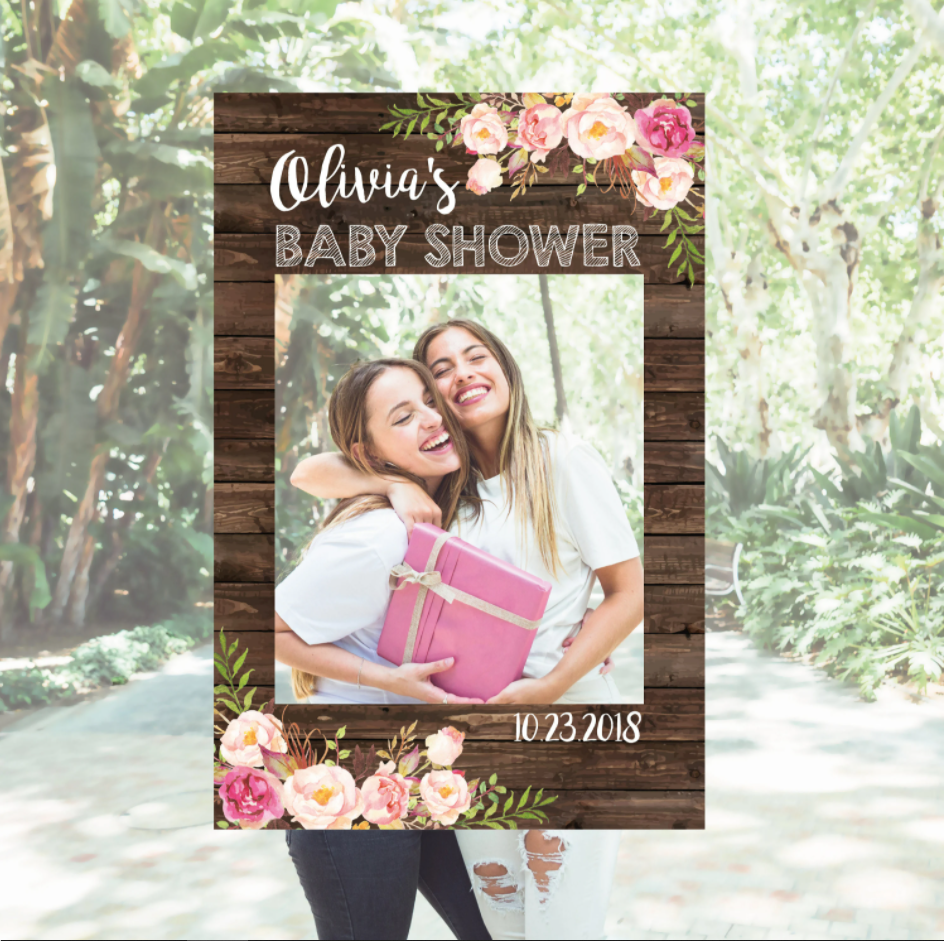
It is undoubtedly one of the biggest joys you can experience in your life to experience the tag of mom-to-be. The past few months have flown by in a flash. It seems like yesterday when you learned you were expecting & today you’re throwing a baby shower. Wouldn’t it be great if the baby shower photo booth frame added an extra special touch to your moment?
How to Make a Baby Shower Photo Booth Frame?
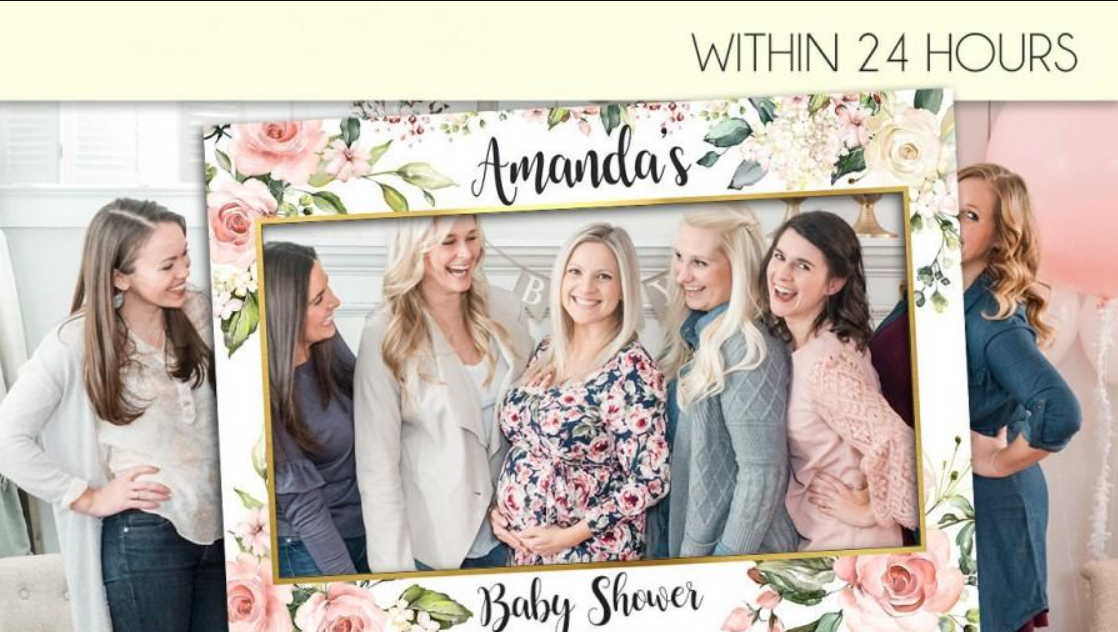
You can make a DIY photo booth frame for a baby shower by following this step-by-step guide.
Measuring The Photo Booth Frame
With a large cardboard piece, start making your photo booth frames. Craft shops usually sell large cardboard pieces. Measure the cardboard and mark the desired size before cutting or turning it.
Guidelines for marking
Measure 51.25 centimeters by 42 centimeters for the DIY baby shower photo booth frame. In order to mark 10.5 centimeters from the bottom of the cardboard, mark 3 centimeters on both the left and right sides of the board starting from the edge.
To mark the cardboard, use a black marker. A pencil is acceptable, but you won’t be able to see the lines very clearly.
Making the photo booth frame from cardboard
You should do the following before cutting the cardboard:
- Protect your hands by wearing gloves.
- Mark the lines on the ruler and then cut it using a cutter.
- Make sure the ruler is straight on the cardboard to ensure clean cutting.
- Make sure the ruler doesn’t move from its place.
- Do not use scissors since cardboard is challenging for them.
Smoothing
Using sandpaper, smooth the edges after cutting has been completed. Since the edges of the sandpaper are sharp, we recommend that you use it. Sharp edges can easily cut your hand if not smoothed. Rub the frame gently with the sandpaper. Excessive rubbing will cause the frame to become unbalanced.
Strengthening
Standing still with cardboard isn’t enough. For a longer lifespan, add strengthening elements. The cardboard needs to be backed with a thermocol sheet. Measure and cut the thermocol sheet to fit the cardboard.
Glue the thermocol sheet to the cardboard with a glue gun. Apply pressure to the sheet. To hide the thermocol, mount another piece of cardboard on the backside. On the edges of the baby shower photo booth frame, paste strips of cardboard after measuring the size.
Decoration of the photo booth frame
The frame can now be decorated. Depending on your preference, you may want to choose to keep the baby shower frame white or colored. Choose an acrylic color if you want to color it. Do not use watercolor because water will weaken it.
You can then write whatever you want on it after you’ve colored it. These are some of the sassy lines that you can write on the frame:
- Three becomes two
- Is it a boy or a girl?
- When is your due date?
- It’s the aunt squad
- It’s the uncle squad
- The baby will be spoiled by my love
- Are you ready?
- A bundle of joy is on its way
- Congratulations, little one
- You’re already my favorite
- Baking a bun
- It’s time to poop
You may want to decorate the frame with stickers of flowers, teddy bears, baby onesie, baby walker, and baby shoes. Wrap ribbon around the sides of the frame matching the theme’s color.
Decorate your baby shower photo booth frame with some of these ideas
A photo booth frame alone will not turn your baby shower into a rock and roll party. Decorate it with the following ideas;
Onesie curtain for baby shower
A curtain is present in every third house. What if we did something extra? Using different colored papers, cut shapes of baby onesies. Attach the onesies to a thread and leave a gap between them. Your string should be long enough to cover your party’s entrance door.
Trolley with lollipops for baby shower
An empty table at a party looks boring. Arrange some candies on it creatively. The local market has a dozen or two dozen decorative trolleys you can purchase. Fill the trolleys with foam and stick the lollipops on top. Make sure the lollipops are wrapped in plastic for a more appealing appearance.
Themed Baby Shower Gift Bags
So, you won’t be giving anything to the kids attending your party? That’s not fair. Consider buying gift bags and adding a few gifts to them from the marketplace. Afterward, place the gift bags alongside the trolleys for a more elegant appearance.
In this situation, you shouldn’t try to do everything yourself. Invite a friend or sister to come with you. Last but not least, capture as many pictures with the baby shower photo booth frame as possible.

 Been in or around engineering/manufacturing my entire life, grandparents who let you build cars with them have their uses!!
 After spending 4 years in Leicester studying physics where my final dissertation project was heavily programming based I was keen to begin a career in software development. Working on Photobooths seemed like a fun and interesting place to start.
 Born in Malta in January 1989, Maurizio has always dreamt of doing something impossible in his life. That’s exactly what he has done a few years ago when he decided to leave everything and moved to the West Midlands. His Passion was also another reason why he has chosen the West Midlands – West Bromwich Albion. Worked in different industries, like tourism, advertising, construction and entertainment, finance was always something that he wanted to do. Asking who Maurizio is to his friends, you would have one simple answer, – Joker, A Caring Person and a Plane Spotter.
 From College went into the family run business – Advertising Agency. Eventually took over the reins of the company and moved it into a more technical direction. After retirements changed the dynamic of the company we changed direction to a Direct Mailing Company specialising in digital and mailing’s for Electricity companies (MEB, British Gas, nPower). After a profitable run I felt a change was needed and so started a Programming and Consultancy Business. This eventually led me to the world of PhotoBooths and beyond.