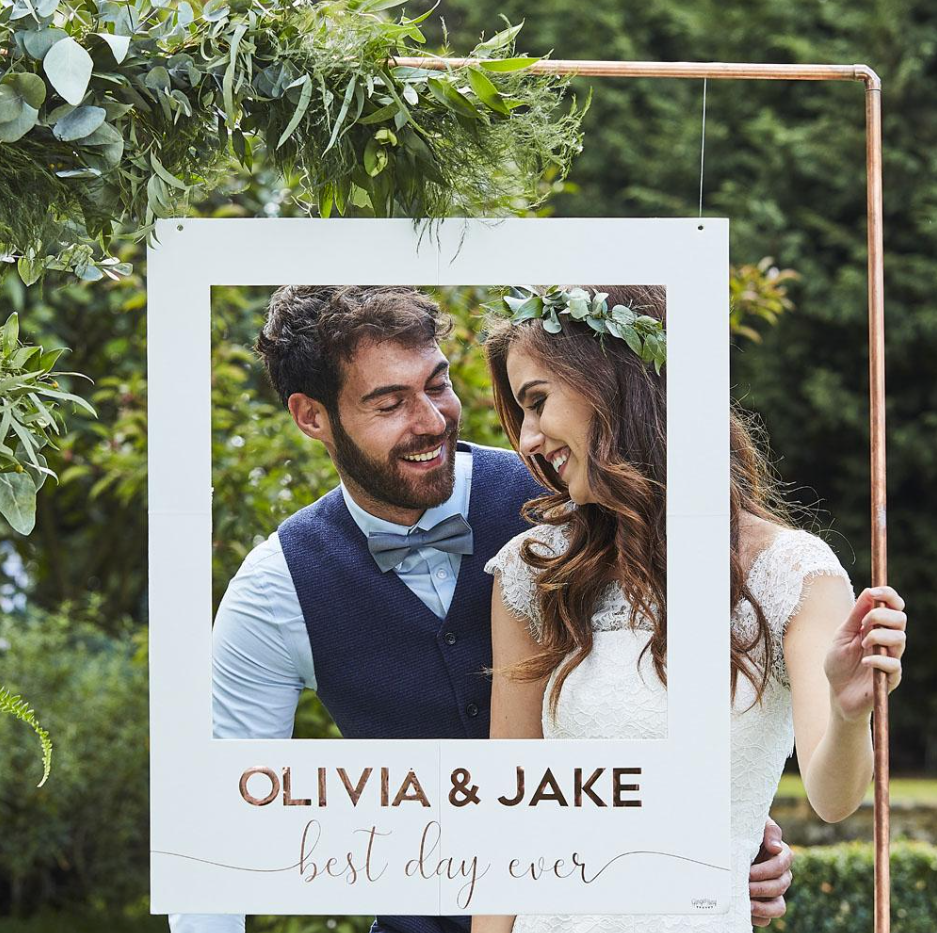
Having a customized picture frame for the party is one of the best ways to keep your guests entertained and make sure they have a great time at the party.
We all enjoy posing for pictures in the frames whether the party is for teenagers or adults.
However, the question that folks are asking is how to make a picture frame for a photo booth?
Making a Photo Booth Frame – Step by Step
This tutorial will explain how to make DIY photo booth frames step-by-step. You will need to check out the list of items you will need before you start the process.
There are a few things you need to prepare
- Printed on cardboard
- The scissors
- Glue for adhesives
- I have a glue gun
- Knife or cutter
- “Blade” (singular)
- Sheets of foam
- Flowers that are artificial
- It’s a pencil
- Rules of procedure
- The sandpaper
- A binding wire is used to bind documents together
Step #1
Using the cardboard that you want to make the photo booth frame from, draw the size of it. You might be making the frame for 1-2 people, so keep the aspect ratio 36 x 24 inches if you are making it for two or more people.
In the same way, a frame that accommodates 3-4 people should measure at least 48 x 36 inches when it comes to size.
It is very important that the lines you draw in the frame are clear to facilitate effortless cutting.
Step #2
Once you have sketched the picture frame for your party onto the cardboard, using a blade or cutter, draw the body of the frame.
To make sure that you are cutting straight, you need to use a ruler alongside the cutter when using it. If you feel that using this blade is unsafe, you can use some scissors instead.
When you have finished cutting the frame, go over all the edges with sandpaper to smooth them out. Do not rub the sandpaper harder than necessary, as this might cause unevenness in your lines.
Step #3
You can paste the paper on the front side of the frame if you want to customize it or add some quotations. Otherwise, skip this part.
You will now need to cut a foam sheet to the same size as your frame so that it will fit in the photo prop. Please do not paste more than one layer of foam sheet. There is no need for more than one layer of foam sheet.
It is prudent to mount the foam sheet with the cardboard using a glue gun rather than a stapler. Once it has been mounted, let it sit for five to seven minutes before continuing.
Step #4
You should now take another piece of cardboard for extra strength. The second layer of cardboard should be attached to the backside of the frame. Glue should be used to attach the cardboard.
Please remember that glue guns are not recommended for use by children. Please make sure that you use the glue gun under the supervision of an adult if you are underage. The glue gun could burn your hands if you use it on your own.
Step #5
It’s time to take some cheesy pictures with your photo booth frame. With the help of a silver wire, you can mount some artificial flowers to decorate the frame. If you decide to use a binding wire, be sure that an adult supervises you while you work.
Having Trouble Making a Photo Frame for Social Media? Here’s how.
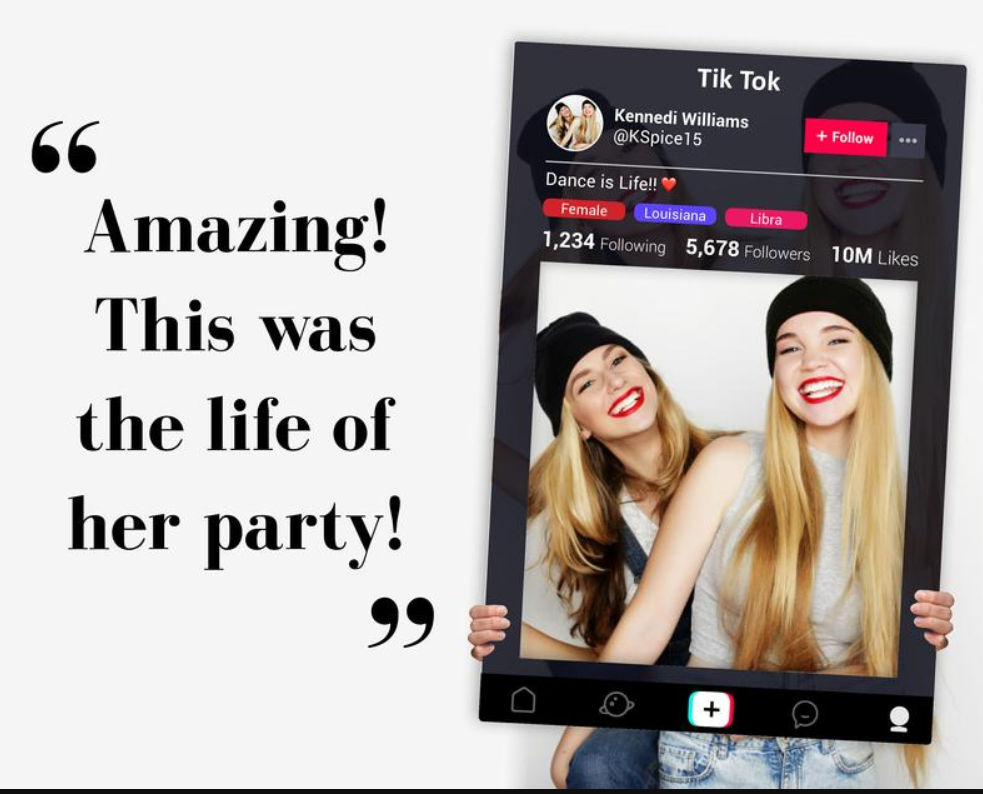
In the past few years, social media photo frames have become quite popular. However, you don’t have to hire a professional artist to make one for you. You can do it yourself by following the following steps;
Step #1
The social media frame can be downloaded online before you cut or rub the cardboard. Social posts on Instagram are widely used for this purpose because they appear to be extremely attractive.
You should print the post at a size that is wide enough for the fonts to be visible. In addition to the aforementioned options, you also have the option of personalizing the print with your name, location, and username.
Step #2
It is important to put the picture aside and cut out the frame after downloading it. The process for making the photo prop frame is essentially the same as mentioned previously.
In this case, what most people do is paste the picture first before cutting the frame, which turns out to be a mistake. If you paste the picture before cutting the frame, there is nothing unusual about it.
As a result, if you do not have the same aspect ratio on all sides of your picture, or if you must trim the frame more, you will get an unattractive picture.
Trimming the body of the image will also cut any element or text that is contained within the image, thus ruining it.
Step #3
It is now time to cover the backside of the frame with foam sheets and cardboard. Alternatively, if you wish you could paste some flowers on the backside. If you want to take a sassy picture with the frame, now is the time to call your friends up.
Here are some mistakes you should avoid when making the photo booth frame
- There should be straight margins on all four sides of the page;
- Smooth the edges of the sandpaper with the sandpaper by gently rubbing it;
- The picture should not be pasted before the frame has been cut;
- Place a single layer of foam sheet rather than multiple layers;
- For extra strength, use two sheets of cardboard instead of one.
If you follow the procedure described above, you can make as many frames for your party as you want.
If you keep the photo booth frame safely, you can be sure that it will last long and effortlessly. Make sure that while making the frames, you do not make these mistakes.
Lastly, I would like you to share your experience regarding how making the photo booth frames went for you.

 Been in or around engineering/manufacturing my entire life, grandparents who let you build cars with them have their uses!!
 After spending 4 years in Leicester studying physics where my final dissertation project was heavily programming based I was keen to begin a career in software development. Working on Photobooths seemed like a fun and interesting place to start.
 Born in Malta in January 1989, Maurizio has always dreamt of doing something impossible in his life. That’s exactly what he has done a few years ago when he decided to leave everything and moved to the West Midlands. His Passion was also another reason why he has chosen the West Midlands – West Bromwich Albion. Worked in different industries, like tourism, advertising, construction and entertainment, finance was always something that he wanted to do. Asking who Maurizio is to his friends, you would have one simple answer, – Joker, A Caring Person and a Plane Spotter.
 From College went into the family run business – Advertising Agency. Eventually took over the reins of the company and moved it into a more technical direction. After retirements changed the dynamic of the company we changed direction to a Direct Mailing Company specialising in digital and mailing’s for Electricity companies (MEB, British Gas, nPower). After a profitable run I felt a change was needed and so started a Programming and Consultancy Business. This eventually led me to the world of PhotoBooths and beyond.