In our world, where every aspect of our life is social, and we also like to share our moments of happiness on social media, we live in a social world. It is for this reason that we always take selfies, take pictures, and upload them with beautiful captions.
Can anyone guess what you need to do if you have something that doesn’t need a caption or a frame? There you are. You guessed it right, we are talking about the beautiful Cardboard Frame for Photo Booths.
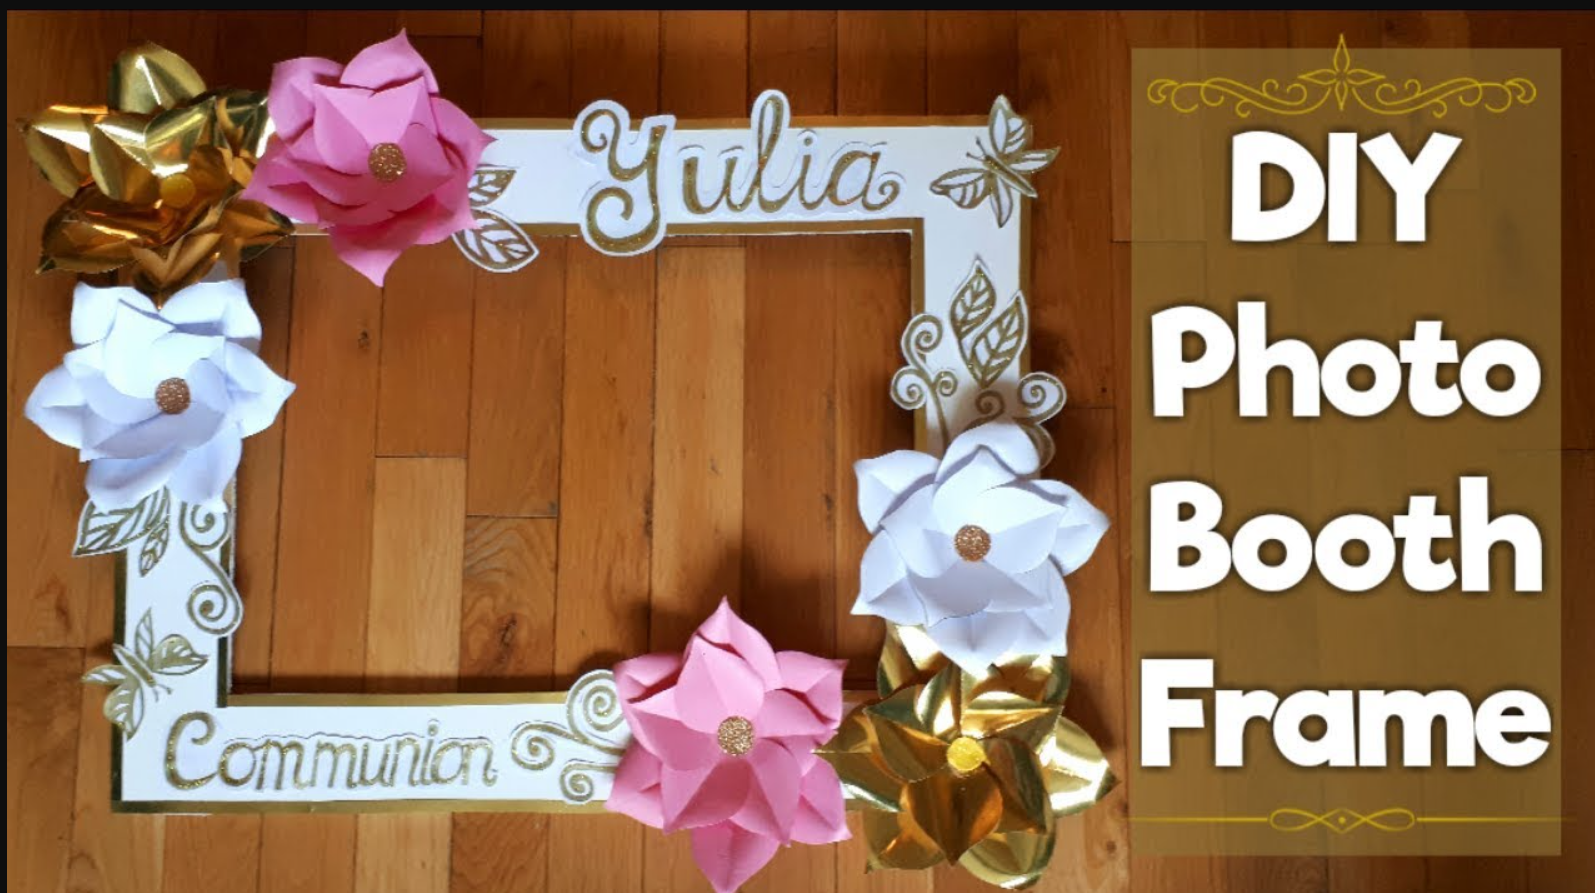
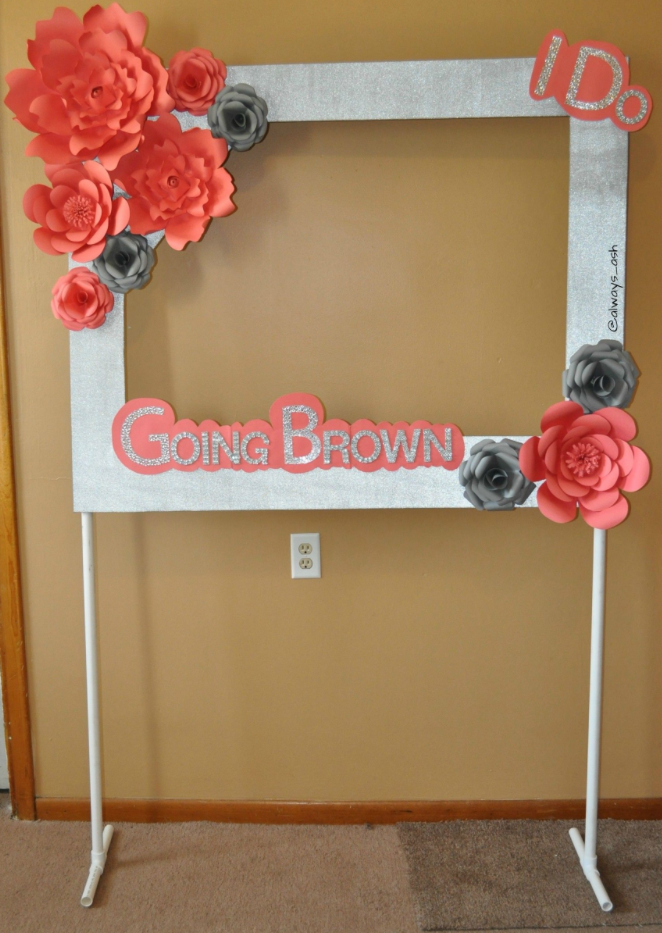
DIY Photo Booth Frame
You don’t need anything else to make your pictures more appealing and appealing, thanks to this incredible thing called a Photobooth frame. In addition, a DIY photo booth frame is a fun way to entertain your guests at any event. They will surely enjoy the novelty of it.
Following a few simple steps, we are going to present you with a full tutorial on how to make a cardboard frame for a photo booth out of cardboard for obvious and money-saving reasons.
What Makes a Good Photo Booth Frame Made from Cardboard
Here are the materials you will need to make the best cardboard frame for a photo booth. Everything you need is available in your home. Check them out.
- Foam board measuring A2. It can be bigger, but not smaller than that
- Using scissors or a knife
- Using a ruler and pencil
- Support for cardboard. You can use a cardboard box in the shape of a sphere.
- Paper transfer
- Pencil and marker
- Wording for vinyl decals
- You can decorate your frame with fake flowers or anything else that looks good
- Wet sandpaper
A Step-By-Step Guide To Making Cardboard Frames For Photo Booths?
As soon as all the material is gathered, let’s get to work with some simple steps and make a brand new handmade item.
The first step
Under the cardboard, place something to protect your photo booth’s surface. Outline the frame with the help of a pencil and ruler. For inspiration, look at a Polaroid photo. Place the vinyl decal on the board if you are using one. Leave some space between the vinyl decal and the board. Cut a rectangle out of the cardboard.
The second step
Next, cut the cardboard with a knife. If you prefer, you can also use a scissor. To make cutting the cardboard easier, draw the lines more darkly. Ensure the cardboard is straight and smooth when cutting.
The third step
Making a cardboard frame for a photo booth is probably the most creative part of making it. Firstly, you will need to paint it in the color of your choice. After it has dried, apply the vinyl decal on the frame, write the most beautiful caption on it, then you can paint over it. Afterward, it’s up to you to determine how you want the wording on the frame to look. As well as writing on the bottom, left, and right, you can also write on the top of the page.
The fourth step
The last thing we suggest is to decorate the corners with beautiful flowers or other attractive items. You now have your own handcrafted photo booth frame that you can use for any event or occasion.
This video shows you step-by-step how to make a DIY Photo Booth frame with some simple materials. When it comes to this social life that is so busy, try to do something new.
Make your own DIY Photo booth frame from all those beautiful things you consider waste.
Create Handcrafted Photo Booth Frames and Start Selling Them
It is possible for you to start a business after completing this tutorial. With the help of this one tutorial, you can easily launch your own small business. There is always some new creative way for people to share pictures on social media; DIY photo booth frames are one way you can offer them. If it is loved by the people, you can sell them the handmade photo booth frame at an affordable price.
You need to start a new business in your free time and do something worthwhile. There is one thing to remember though: when you make a DIY photo booth frame for the first time, it’s good, the second time, it’s even better, and the third time is great. So, go forward to taking the first step, and then you will surely be successful in achieving your goals.
The Conclusion
The authors hope that you find this article to be beneficial and look forward to making the Cardboard frame for the photo booth without spending a dime. This way you can save money and do things yourself so that you can feel proud of your work. From now on, you should upload more awesome pictures on your social media page.
 Been in or around engineering/manufacturing my entire life, grandparents who let you build cars with them have their uses!!
 After spending 4 years in Leicester studying physics where my final dissertation project was heavily programming based I was keen to begin a career in software development. Working on Photobooths seemed like a fun and interesting place to start.
 Born in Malta in January 1989, Maurizio has always dreamt of doing something impossible in his life. That’s exactly what he has done a few years ago when he decided to leave everything and moved to the West Midlands. His Passion was also another reason why he has chosen the West Midlands – West Bromwich Albion. Worked in different industries, like tourism, advertising, construction and entertainment, finance was always something that he wanted to do. Asking who Maurizio is to his friends, you would have one simple answer, – Joker, A Caring Person and a Plane Spotter.
 From College went into the family run business – Advertising Agency. Eventually took over the reins of the company and moved it into a more technical direction. After retirements changed the dynamic of the company we changed direction to a Direct Mailing Company specialising in digital and mailing’s for Electricity companies (MEB, British Gas, nPower). After a profitable run I felt a change was needed and so started a Programming and Consultancy Business. This eventually led me to the world of PhotoBooths and beyond.